GSO 8" RC Pointing Accuracy
I have long suspected the primary mirror in my RC was somehow loose. After getting confident with Collimation, I finally built up the courage to take it apart and tighten up the central retaining ring. Disassembling the OTA could not be easier. The real issue is putting it all back together!
Please don't attempt this if you are not 100% comfortable with RC Collimation - both primary and secondary mirrors. You should expect to spend a fair amount of time recollimating after the reassembly.
1. Using some tape, put an index mark on the tube and the rear cell to assist in reassembly.
2. Remove the top and bottom rail
3. Remove the 2 radius blocks from the rear cell
4. Remove the 2 phillips head screws from the rear of the OTA and carefully lift the OTA off the rear cell and primary mirror.
5. Put index marks on the primary and the rear cell. This will help keep the collimation during reassembly. The mirror might rotate when you turn the baffle tube or retaining ring in the next steps.
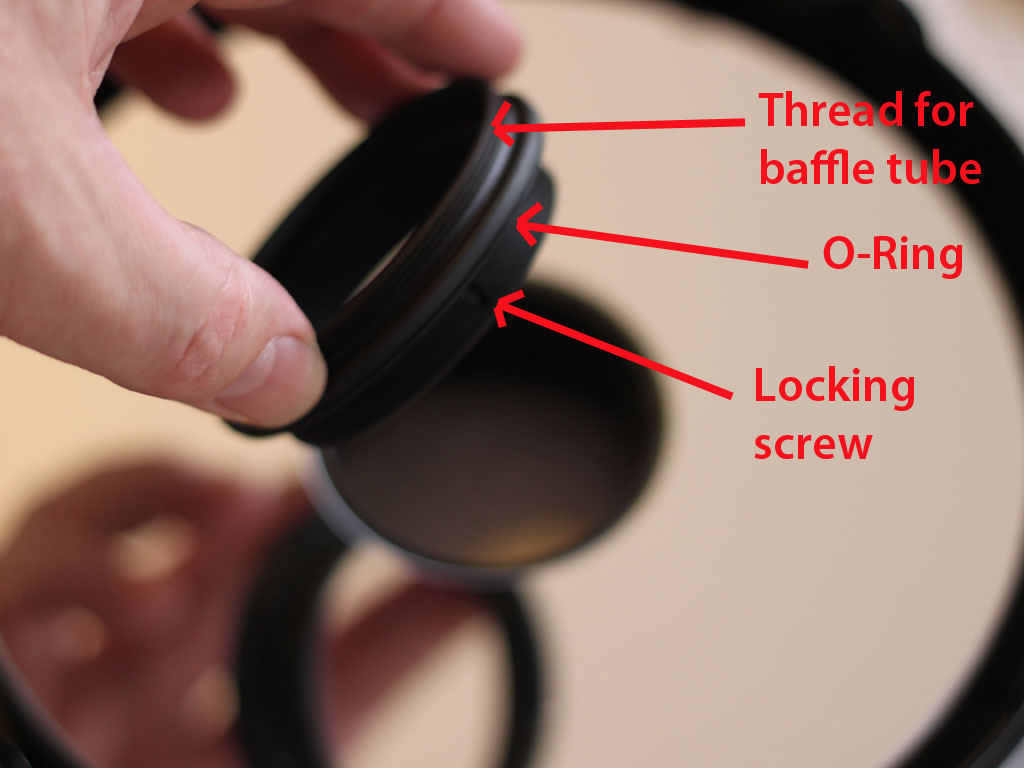
6. Look down the baffle tube. You should be able to see 2 small hex screws in the retaining ring at the bottom. Unscrew the baffle tube, the retaining ring should not be rotating while you do this. If it does, you will in fact be unscrewing the primary. This has been reported before - so be careful!
7. Loosen the 2 very small retaining screws with a hex key
8. At this point if you just want to tighten the mirror, you can screw it all back together nice and tight. I did this by NOT tightening the small hex screws. This let me use the much larger baffle tube to force the retaining ring down tightly. It's much easier to get a good hold of the baffle tube than the smaller locking ring. The first time I tried this I did it too tight and it introduced astigmatism. It should be snug, but not so tight that it distorts the mirror. After reassembly, collimate and check for astigmatism by checking a centred star. Intra and extra focal defocused images should be symmetric. If not, you have pinched the mirror and you will have to loosen the baffle tube.
ONLY PROCEED IF YOU WANT TO FULLY REMOVE THE PRIMARY...say to clean it?
9. Unscrew the retaining ring from the centre of the mirror. You will see that on the underside there is an O-ring - make sure it doesn't fall out.
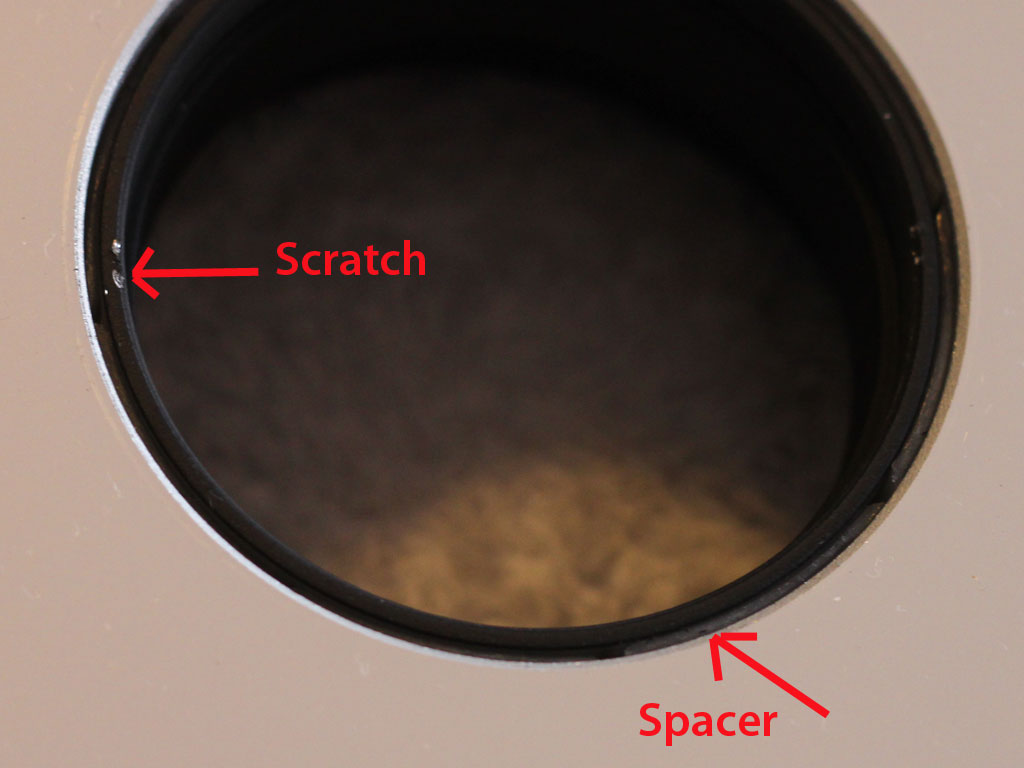
10. The image below shows a close up of the centre of the mirror. You should be able to see the plastic spacer between the mirror and the aluminium tube which passes through the mirror. You can also see scratches on the aluminium where the retaining hex screws have cut into the Aluminium and chipped off some anodising.
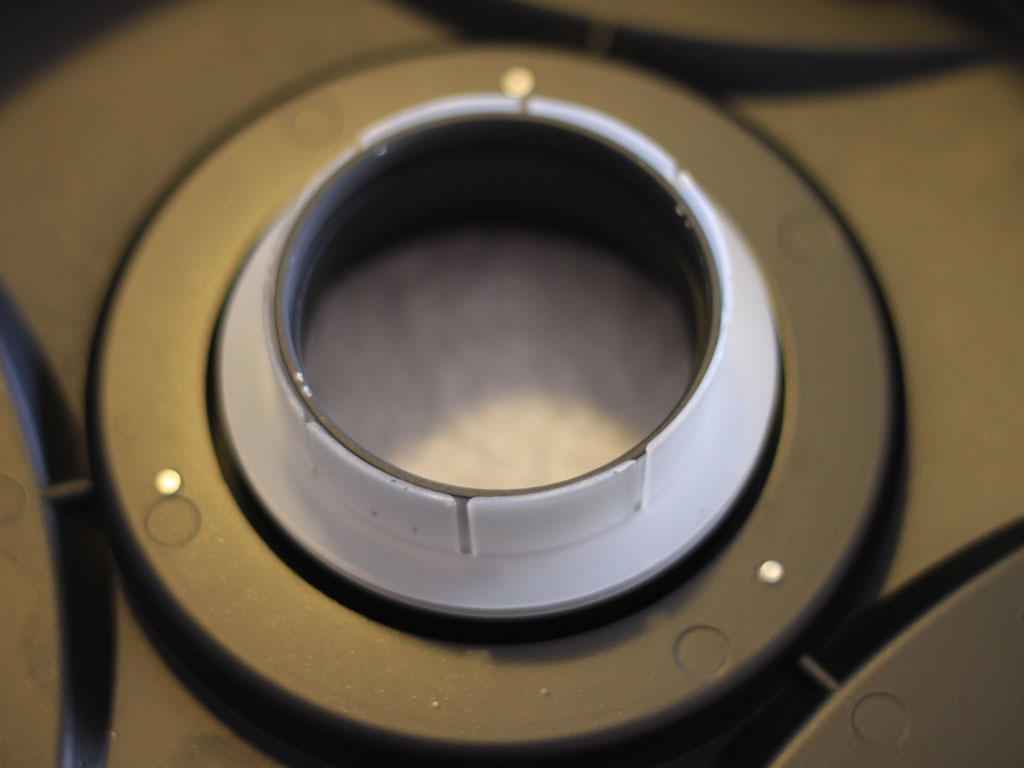
11. Continuing on with the disassembly...when the mirror is removed, you can now see how the plastic spacer works. The 3 silver screws you can see are the ends of the 'pull' screws on the back of the OTA.
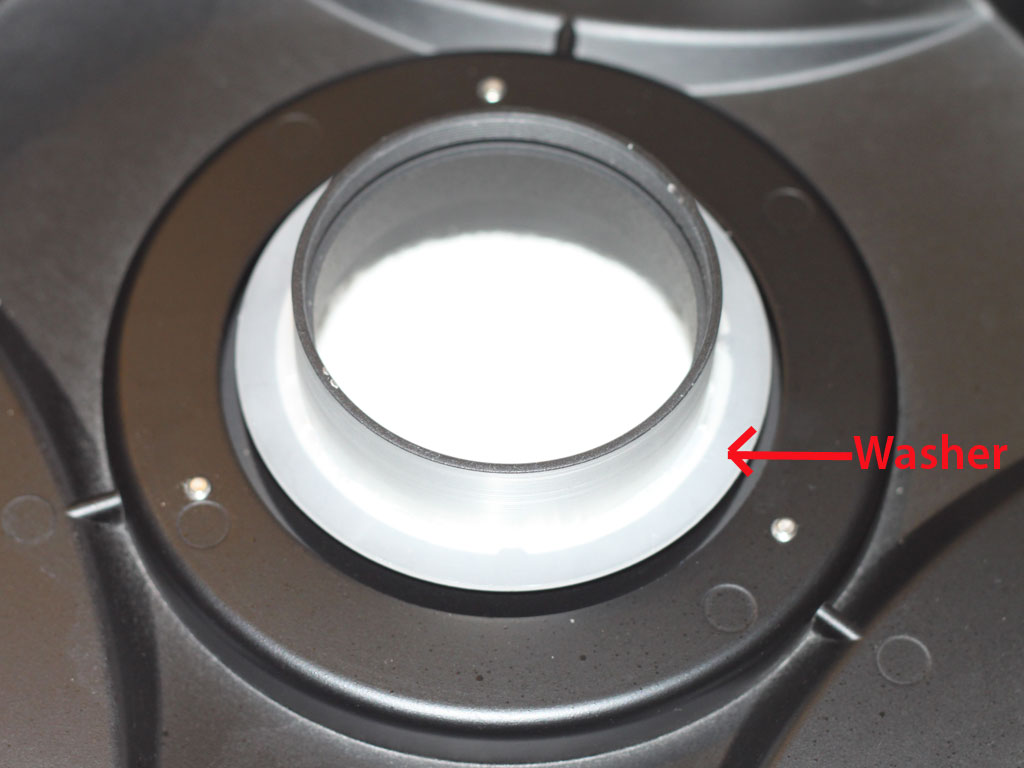
12. Lifting off the plastic spacer, there is a plastic washer located underneath. It's made of the same material. If you want, you can carefully lift this washer off. My one was very poorly made with a rough surface. I plan to replace it with smoother version.
13. Flipping the cell over, the central tube can be removed. Just unscrew the 3 larger hex screws (the pull screws)
14. Now you can see the little platforms the push screws push against and the small springs around the threaded holes that the pull screws go into.
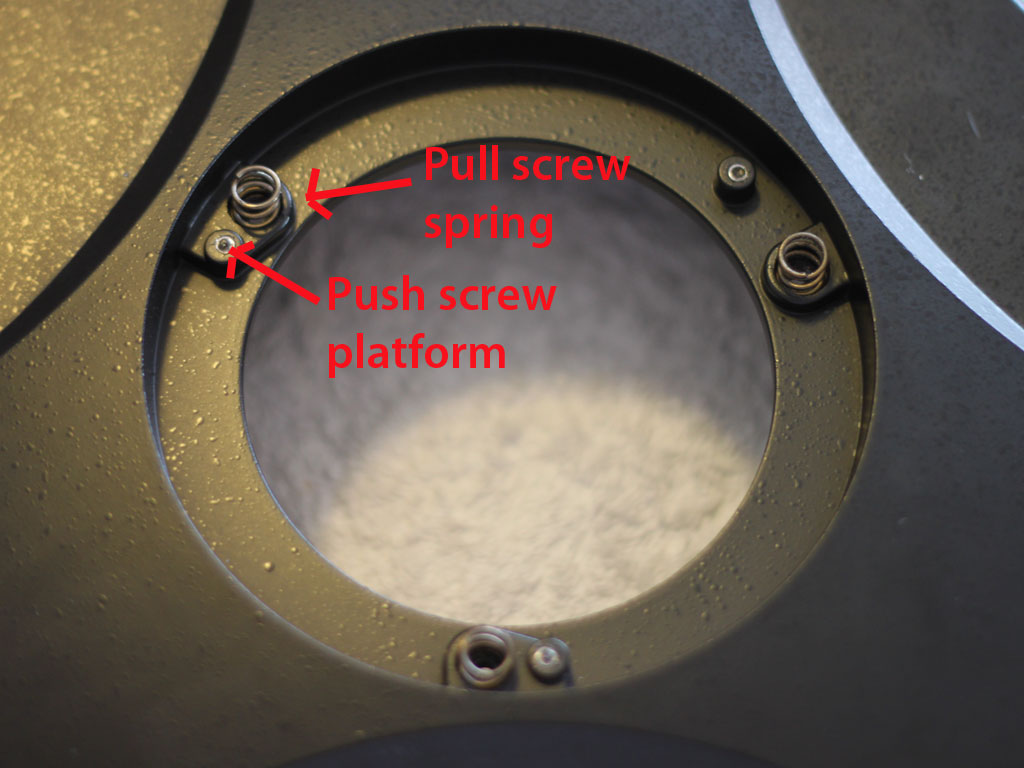
15. Finally here is a close up of the primary mirror retaining device. The hex key is inserted into one of the 'push' screws on the back of the OTA.

16. During the reassembly, I used a set of digital calipers to get all the push screws set to the same depth.
17. Good luck with your collimation.
The Results
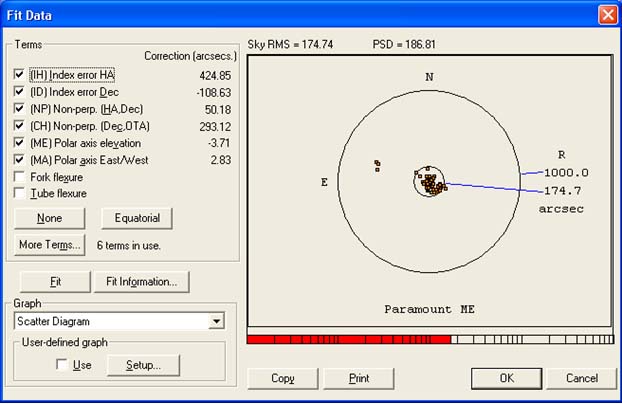
I'm pleased to report the exercise was a success. I have attached screen prints from TPoint before and after this adjustment. Before tightening the primary, my pointing accuracy was RMS 174 arc seconds. After tightening the primary, my pointing accuracy is now RMS 38.9 arc seconds. (note the 2 images have a different scale) This is without any fancy TPoint modeling or any other adjustments at all, just tightening the primary. I'm really happy with this result - to have numbers to back up my hunch and show that it was the primary causing the bulk of my problems all along. I'm glad I didn't rush out and buy an expensive focuser to try to fix this!
Before Primary mirror tightened : 174.7 arcsecond RMS
After primary mirror tightened: 38.9 arcsecond RMS
